
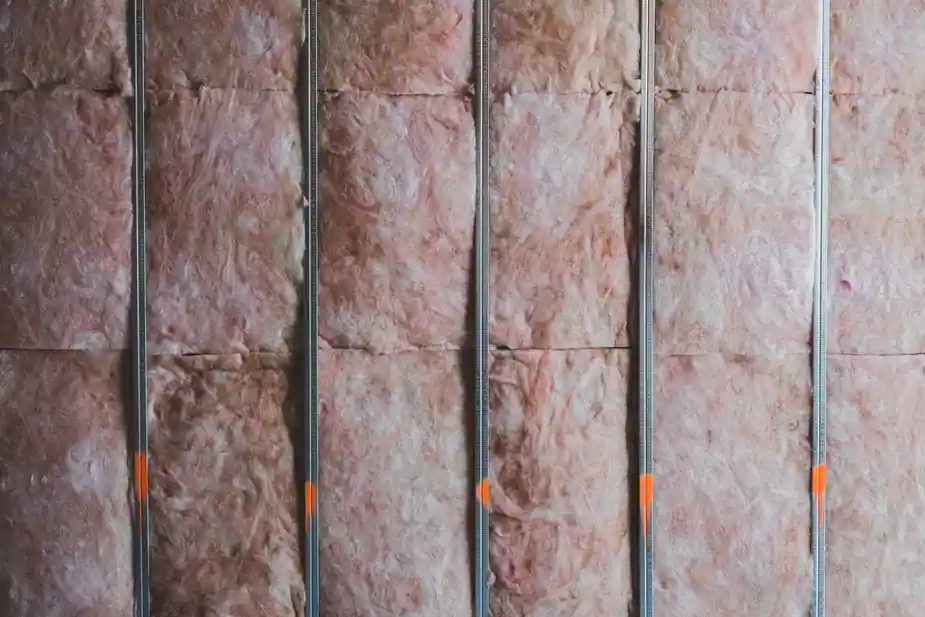
Rockwool Safe And Sound Installation- Best 7 Steps to Install: Complete Guide to Better Soundproofing and Fire Protection
Creating a peaceful home is about more than decorating the walls or choosing comfortable furniture. Noise from busy streets, loud televisions, home theaters, plumbing systems, and neighboring rooms can make everyday life stressful. One of the most effective ways to reduce unwanted sound while improving fire safety is by installing ROCKWOOL Safe’n’Sound insulation.
Unlike traditional fiberglass insulation, ROCKWOOL Safe’n’Sound is specially designed for interior walls, floors, and ceilings where sound control matters most. It is made from natural stone and recycled materials, producing dense mineral wool batts that absorb sound waves instead of allowing them to travel through your home.
So, in this guide, we will explain everything you need to know about ROCKWOOL Safe’n’Sound installation, including its benefits, preparation, installation process, common mistakes, maintenance tips, and frequently asked questions. Whether you’re renovating a basement, building a home theater, or simply looking for a quieter living space, this guide will help you complete the project successfully. Let’s explore more information about this topic. If you want to know more information about rockwool insulation, then click this post and read the information.
Firstly, we will understand what ROCKWOOL Safe’n’Sound is – rockwool safe and sound
What Is ROCKWOOL Safe’n’Sound?- Rockwool Safe And Sound
ROCKWOOL Safe’n’Sound is a stone wool insulation product developed specifically for interior soundproofing applications. It is commonly installed inside partition walls, basement ceilings, media rooms, bedrooms, bathrooms, laundry rooms, and home offices.
Unlike thermal insulation designed mainly for temperature control, this insulation focuses on reducing airborne sound while also providing excellent fire resistance.
The material is manufactured by melting volcanic rock and recycled steel slag at extremely high temperatures before spinning it into dense fibers. These fibers trap sound energy and help reduce noise transfer between rooms.
Because the insulation is water-resistant, non-combustible, mold-resistant, and dimensionally stable, it continues performing effectively for many years without sagging or shrinking.
Now explore why we need and must choose or select this insulation-
Why Choose ROCKWOOL Safe’n’Sound?
Homeowners often wonder why they should choose mineral wool instead of fiberglass. The answer lies in its overall performance.
The dense structure of ROCKWOOL Safe’n’Sound provides significantly better sound absorption than many standard insulation materials. It helps reduce voices, television noise, music, plumbing sounds, and everyday household disturbances.
Another major advantage is fire safety. Stone wool does not burn and can withstand temperatures exceeding 1,000°C, making it an excellent choice for interior partitions where additional fire protection is desired.
Since the material naturally repels water while allowing moisture vapor to pass through, it also resists mold growth and mildew, making it suitable for damp areas such as basements.
Additionally, the insulation maintains its original shape over time without settling, ensuring long-lasting acoustic performance.
Where Can ROCKWOOL Safe’n’Sound Be Installed?
One of the biggest strengths of this insulation is its versatility. It can be installed in many interior spaces where reducing sound transmission is important.
Popular installation areas include interior walls between bedrooms, bathrooms, home offices, laundry rooms, kitchens, apartments, duplexes, media rooms, recording studios, basement ceilings, and between floor joists.
It is especially useful in homes where multiple family members have different schedules or where privacy is important.
Builders also frequently install it in commercial offices, schools, healthcare facilities, and hotels to improve acoustic comfort.
Tools and Materials Required– rockwool safe and sound
Before beginning the ROCKWOOL Safe’n’Sound installation, gather all necessary materials so the project runs smoothly.
You will typically need insulation batts, measuring tape, utility knife, insulation knife or serrated knife, straightedge, marker, safety glasses, gloves, long sleeves, dust mask, ladder, and drywall materials if finishing the wall afterward.
Although mineral wool creates less airborne dust than some insulation products, wearing protective clothing helps keep the installation comfortable.
Preparing the Wall Before Installation
Proper preparation plays a major role in achieving the best soundproofing performance.
Begin by ensuring the wall cavity is clean and completely free from construction debris, nails, loose materials, or leftover insulation. Check that electrical wiring, plumbing lines, and HVAC components have already been installed because these services are much easier to access before insulation is added.
Inspect the framing to verify that studs are evenly spaced and that no moisture problems exist inside the wall cavity. Mineral wool performs best when installed in a dry environment.
Measure every cavity individually because framing dimensions may vary slightly throughout the project.
Taking accurate measurements before cutting helps reduce waste while ensuring each batt fits tightly inside the cavity.
Step 1: Measure Each Wall Cavity- rockwool safe and sound
Start by measuring the height and width of every stud space.
Although most residential framing follows standard dimensions, not every cavity is identical. Small measurement differences can affect how tightly the insulation fits.
Careful measuring helps achieve a snug installation that maximizes acoustic performance without compressing the insulation.
Step 2: Cut the ROCKWOOL Safe’n’Sound Batts
Lay the insulation on a flat work surface.
Using a straightedge and sharp insulation knife, cut each batt slightly larger than the measured cavity. This slight oversizing allows the batt to fit securely between studs through friction alone.
Avoid crushing or over-compressing the insulation because compressed batts lose some of their sound-absorbing effectiveness.
Clean, straight cuts also produce a more professional installation.
Step 3: Place the Insulation Between the Studs
Insert each batt carefully into the wall cavity.
The insulation should fit snugly against the framing members without leaving visible gaps along the edges.
Avoid forcing the batt into place. Instead, gently press it into position until it fills the entire cavity from top to bottom.
A properly installed batt remains securely in place without staples, adhesives, or mechanical fasteners.
Step 4: Install Around Electrical Boxes- rockwool safe and sound
Electrical outlets and switch boxes require careful attention.
Rather than compressing the insulation behind electrical boxes, cut small openings so the batt fits neatly around them.
This helps maintain consistent sound absorption while avoiding damage to wiring or electrical components.
Taking extra time around these areas greatly improves the finished appearance and performance.
Step 5: Fit Around Pipes and Plumbing
Many interior walls contain plumbing lines.
Instead of pushing the insulation behind pipes, split the batt partially so one section fits behind the pipe while the remaining section fits in front.
This method fills the entire cavity without leaving air gaps that allow sound to travel.
Careful trimming around plumbing also improves overall installation quality.
Step 6: Complete Every Wall Section- rockwool safe and sound
Continue installing each batt one cavity at a time until the wall is completely insulated.
Regularly inspect your work to ensure every cavity is fully filled.
Replace any damaged or excessively compressed pieces with new sections for the best results.
A consistent installation provides more effective sound reduction throughout the building.
Step 7: Install Drywall Correctly- rockwool safe and sound
After insulation has been installed, drywall completes the soundproofing system.
Many contractors use resilient channels, acoustic caulk, and multiple drywall layers to further reduce sound transmission.
Seal all joints, electrical penetrations, and perimeter gaps with acoustic sealant to prevent sound leaks.
Proper drywall installation often has just as much impact on noise reduction as the insulation itself.
Tips for Better Soundproofing Performance
Simply installing insulation may not completely eliminate noise. The best acoustic results come from combining several sound-control techniques.
Use high-quality acoustic sealant around drywall edges, install solid-core interior doors, avoid leaving openings around electrical penetrations, and consider resilient channels where maximum sound isolation is required.
Double layers of drywall with damping compounds can also improve sound performance in home theaters or music rooms.
Every small improvement contributes to a quieter living environment.
Common Installation Mistakes to Avoid installing rockwool safe and sound
Many homeowners unintentionally reduce the effectiveness of their insulation through simple mistakes.
One common mistake is compressing the insulation too tightly inside the cavity. While it may seem like more material creates better soundproofing, compression actually reduces the insulation’s ability to absorb sound.
Leaving gaps between batts is another frequent issue. Even small openings allow sound waves to pass through.
Incorrect cutting around electrical boxes and plumbing pipes can also create sound leaks.
Finally, skipping acoustic sealant around drywall joints often reduces the overall effectiveness of the entire wall assembly.
Paying attention to these details helps maximize the benefits of your investment.
Maintenance Requirements- rockwool safe and sound
One advantage of ROCKWOOL Safe’n’Sound is that it requires virtually no maintenance after installation.
Because the insulation does not settle, shrink, or deteriorate under normal indoor conditions, it continues performing for decades.
If renovations expose the insulation in the future, simply inspect it for physical damage or excessive moisture before reinstalling drywall.
Most installations remain effective throughout the lifetime of the building.
Benefits of Choosing ROCKWOOL Safe’n’Sound
Homeowners continue choosing ROCKWOOL Safe’n’Sound insulation because it offers several practical advantages beyond sound reduction.
It helps create quieter bedrooms, more comfortable home offices, peaceful entertainment rooms, and better privacy between living spaces. The material also improves fire safety, resists mold growth, repels water, maintains its shape over time, and contains recycled content that supports environmentally responsible construction.
These long-term benefits make it a valuable investment for both new homes and renovation projects.
Frequently Asked Questions About rockwool safe and sound installation
Is ROCKWOOL Safe’n’Sound only for interior walls?
No. It is commonly installed in interior walls, basement ceilings, floor assemblies, and between joists where sound control is needed.
Does it improve thermal insulation?
While it provides some thermal benefits, the product is primarily designed for acoustic performance and fire resistance.
Do I need staples during installation?
No. Properly cut batts usually stay in place through friction between framing members.
Can homeowners install it themselves?
Yes. Many DIY homeowners successfully install ROCKWOOL Safe’n’Sound using basic tools, provided they follow safety guidelines and manufacturer recommendations.
How long does the insulation last?
Under normal indoor conditions, the insulation can last for decades without losing its shape or sound-absorbing properties.
Conclusion of Rockwool Safe and Sound Installation
Installing ROCKWOOL Safe’n’Sound is one of the most effective ways to reduce unwanted noise while improving fire resistance inside your home. Whether you’re renovating a basement, building a media room, upgrading bedrooms, or improving privacy between living spaces, this mineral wool insulation offers dependable long-term performance.
A successful ROCKWOOL Safe’n’Sound installation starts with careful preparation, accurate measuring, precise cutting, and proper placement within each wall cavity. Avoid compressing the insulation, seal gaps thoroughly, and combine it with quality drywall installation for the best acoustic results.
With minimal maintenance requirements and decades of reliable performance, ROCKWOOL Safe’n’Sound remains a trusted solution for homeowners and professionals seeking quieter, safer, and more comfortable indoor environments.
Do let us know how you feel about this information by commenting.
Like our Facebook page and follow for other updates like this.